Read our blog about our HDR features
We recommend using the multi-bracketing mode for the creation of 3D tour Pocket Websites. From our tests and observations, photographers using HDR multi-bracketing mode get better image quality with less (or no) post-production editing.
To assist you with our recommendation, we have developed a comprehensive set of instructions and features to properly work with HDR multi-bracketing.
Keep in mind that whatever the technique you decide to use to produce your 360 images, if you achieve great image quality, you know you will have a great 3D tour.
UI Capture is an application we develop that make everything easier and simpler. With this application, you can go through all the instructions in less than a minute.
Go to UI Capture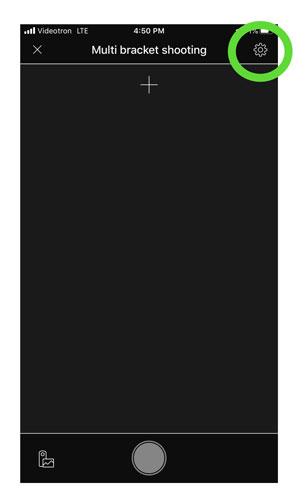
Find the settings icon in the Ricoh Theta App and click on it to access the camera settings
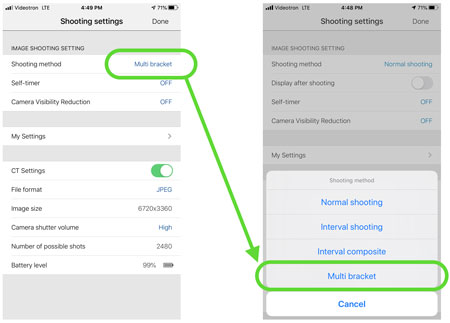
Click on Shooting Method and select Multi bracket option.
You will be storing a lots of images with multi-bracketing. To avoid busting your camera memory, select to only save the jpeg format. The RAW format cannot be used with our HDR fusion in the Tourbuzz platform.
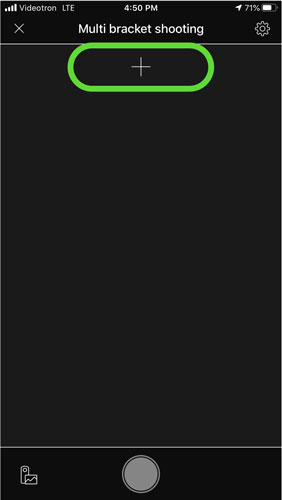
You will need to add one exposure at the time. Use the + sign to add each additional exposure.
A minimum of 3 exposures is recommended for HDR to avoid the vertical line when connecting the start and the end of the 360 images to be visible. However, we have found that 5 to 7 exposures will provide the best HDR results.
Taking more exposures will also give you more flexibility when shooting different light intensity rooms during your shoot. If some underexposed or overexposed images turn all black or all white, you will still have the enough exposures available to build the final images. That explains why many photographers prefer to shoot with 10 exposures. They are making sure they will always have 5 to 7 good exposures no matter the rooms lighting intensity.
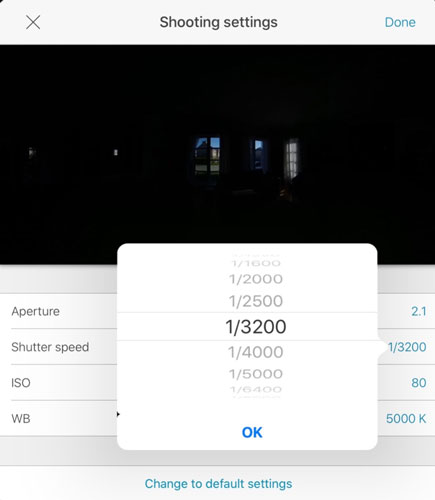
When adding a new bracket, you will have access to an image preview and the exposure settings. Place your Ricoh Z1 in the middle of a room with windows at the property you are getting ready to shoot. Use the image preview of the Ricoh Theta App to set the first underexposed image.
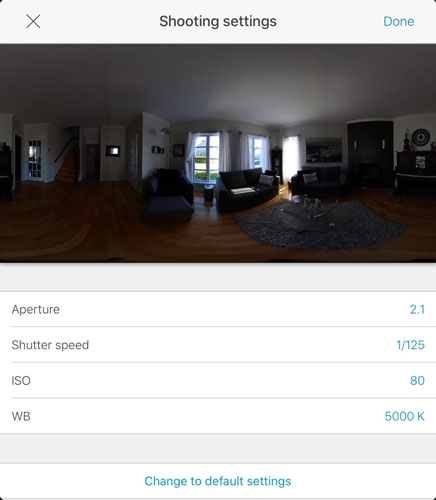
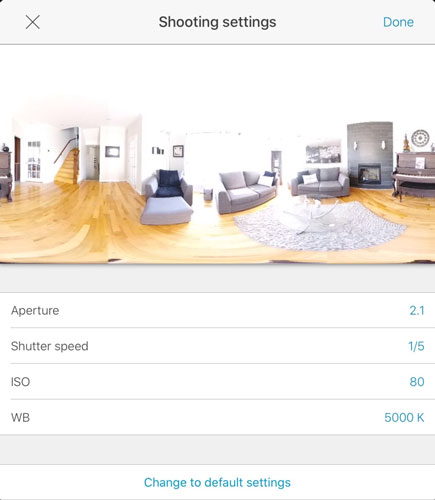
For the Aperture, with the Z1, you have the choice between 2.1 3.5 and 5.6. The Ricoh V and SC2 have only one choice. Choose the largest aperture; 2.1
Ricoh cameras have very noisy ISO. Select the lowest value possible. With the Z1, it's 80.
The default Ricoh Theta Z1 White Balance value is set to 5000 Kelvin. Leave it there for now. You will change it later using the best preview possible between all your exposures.
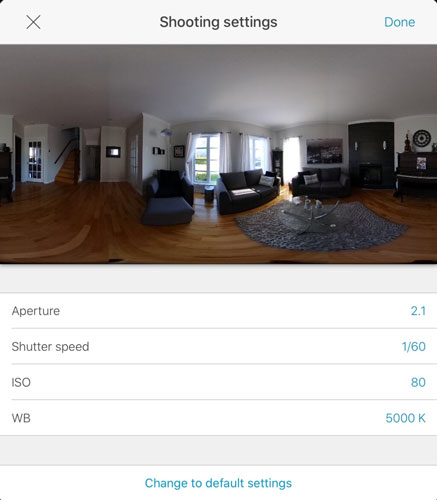
Add a second underexposed image. Change the Shutter Speed until you see around 15% to 20% more color tones. Repeat this process until you can no longer see the exterior scene through the window.


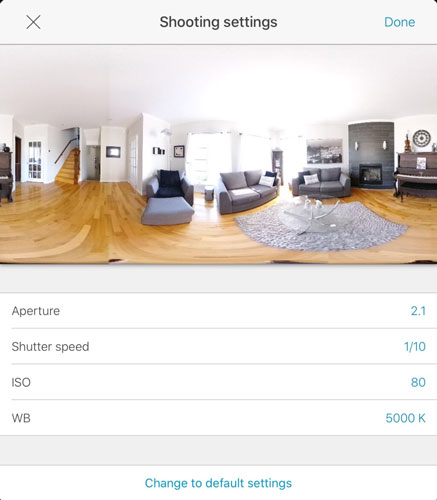
For the most overexposed image, make sure that you can see the texture of the darker elements of the scene. In our example, we can see the texture of the black cover of the armchair, the dark brown of the piano and the black vent on the fireplace.
In our exemple, the most overexposed image has a shutter speed of 1/5 an ISO of 80 and an Aperture of 2.1.
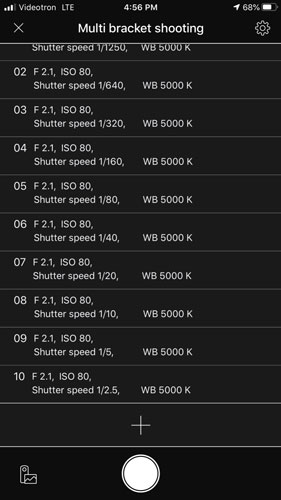
Once all your exposures are defined, you will end up seeing the list of them in your Theta App. All those exposures will be automatically trigged one after the other when pressing the white circle button on the App. We now need to set the White Balance Kelvin value as a final step.
All HDR fusion solutions are highly sensitive to white balance. To avoid off-the-mark white balance final images, you absolutely need to set the Kelvin value properly for each exposures depending of the light environment ambience.
| Kelvin | Light Source |
|---|---|
| 1800 - 2800 K | Match flame, Candle flame |
| 2800 - 3400 K | Sunrise - sunset |
| 3400 - 3800 K | Tungsten Morning/Early Evening, Wood floor, White walls |
| 4200 - 4700 K | Fluorescant Office Building |
| 5500 - 6200 K | Bright Sun, Clear Sky Outdoor Scenes |
| 6500 - 7500 K | Overcast |
| 7500 - 8500 K | Shade |
| 8500 K + | Blue Skies |
Most residential properties will require a Kelvin value between 3000 to 4000K. Office buildings Kelvin value really depends on the office environment and light conditions.
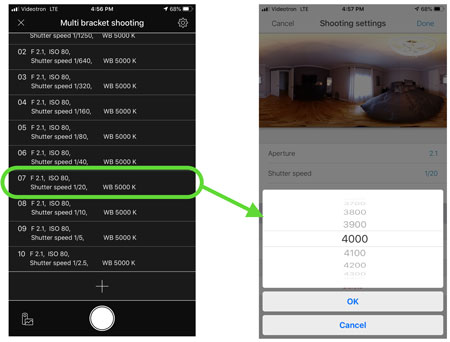
Select an exposure that provides a good preview of the scene. Select the Kelvin based on the Kelvin chart and your preference. Make sure the Kelvin value is providing the true color of the scene.
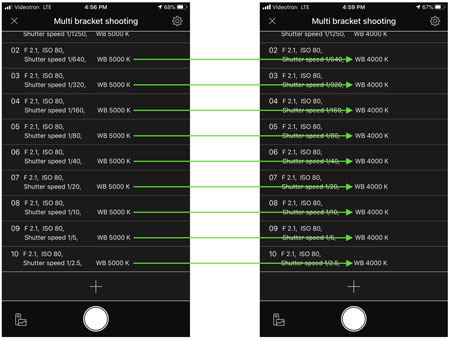
When you created each exposure, the default Kelvin value was set to 5000K. Once you have found the right Kelvin value of your scene, change the value for each exposures one by one. Don't forget this step.
Urbanimmersive offers 2 HDR fusion options. Both HDR options provide you with highly intuitive features to upload your images (exposures), automatically group them by scenes and visually review all photos to highlight any bad images.
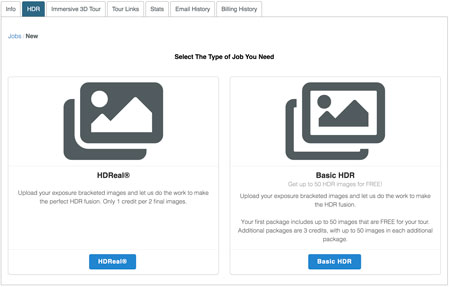
Select your HDR fusion option between HDReal and the Basic HDR. Note that HDReal is a pay per image option while the Basic HDR is free for up to 50 processed images.
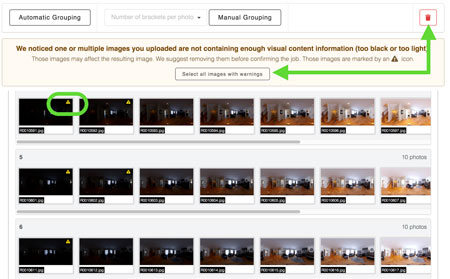
Follow the upload steps until you reach the Image Review screen. The image review will automatically examine the color histogram of each image and will tell you if the exposure is good or not based on the percentage of color present.
Our system will suggest that you delete these images with very low color percentage. If you include too many black exposures, it will cause the whites to appear grey. If the exposure is all white, it will cause the dark colours to appear pale.
Be careful. If you decide to remove too many dark images, you may end up with a poor window blend effect. Also if you remove too many lighter exposed images, you may end up with dark images. We suggest to only remove the images flagged by our system.
Once your HDR fusion process is completed, you will be able to transfert all final images in the 3D tour tab. If you got great images, you will get a great 3D tour.
If you need more information about how to set your Ricoh Theta Z1 HDR multi-bracketing mode, contact our support and it will be a pleasure to help you.
Read our blog about our HDR features